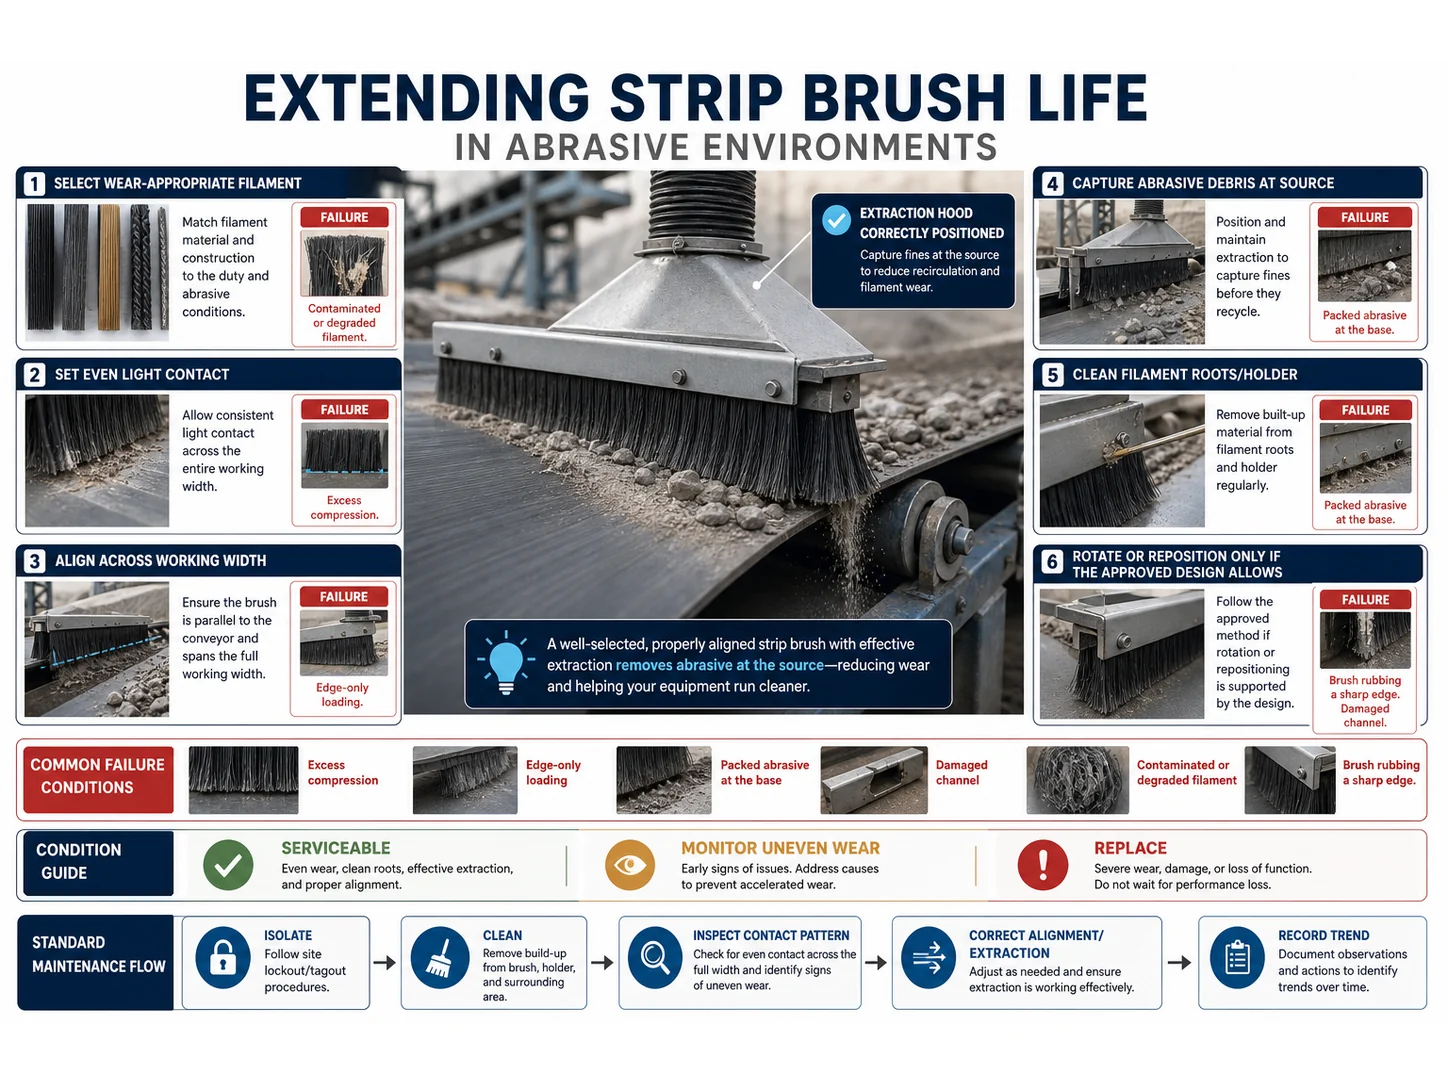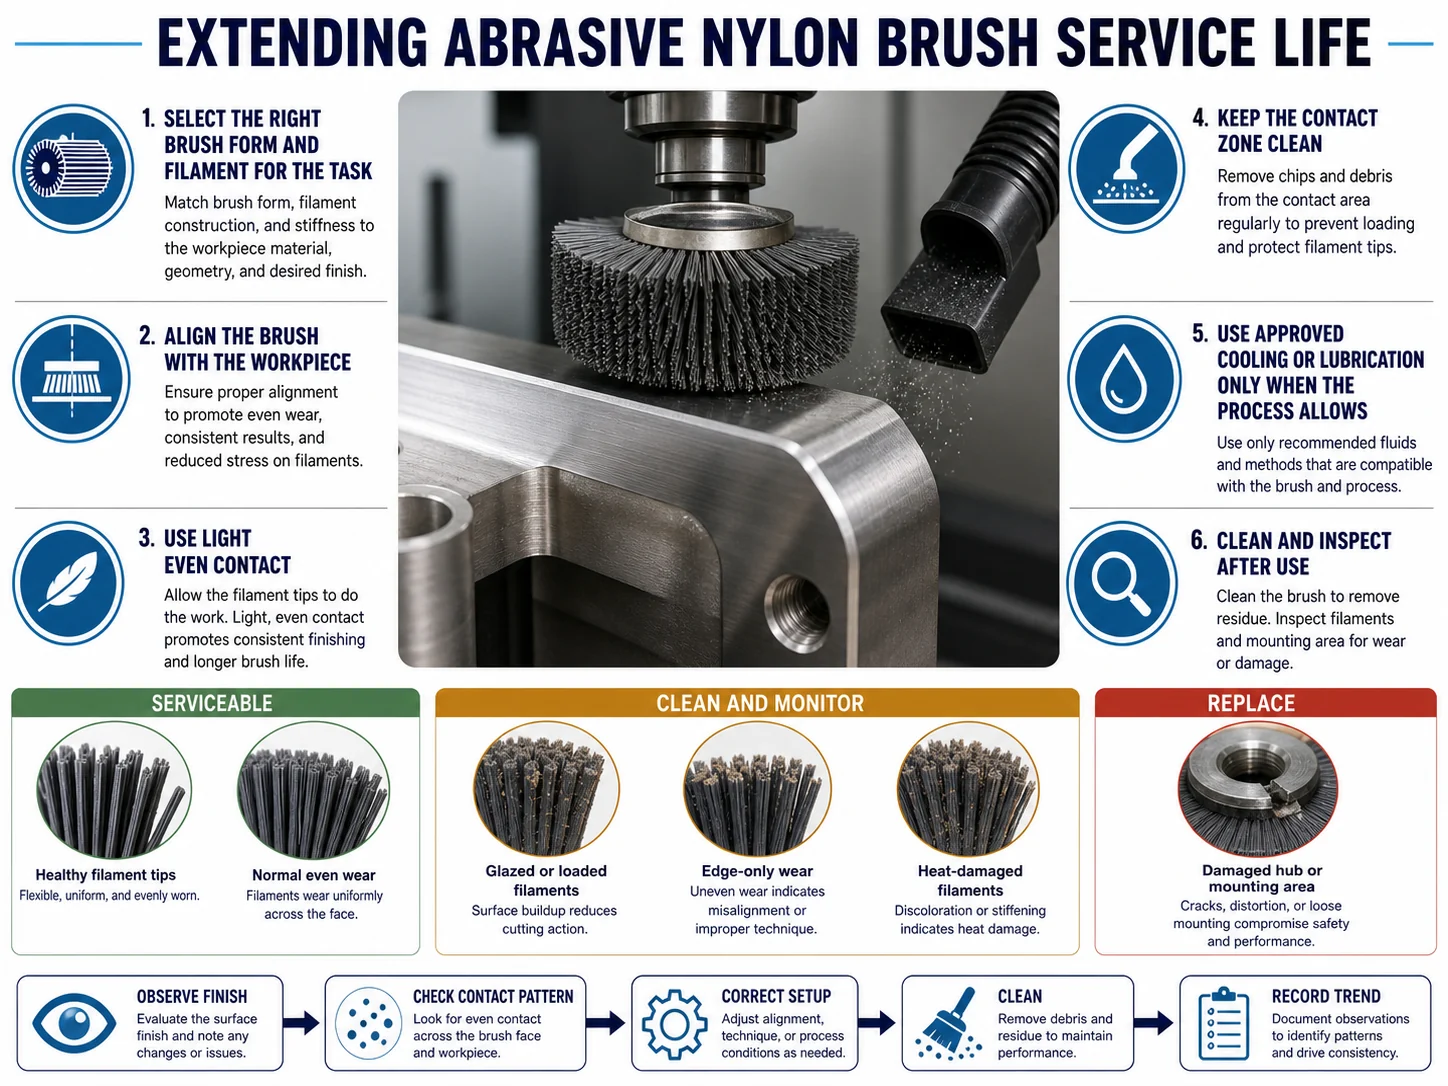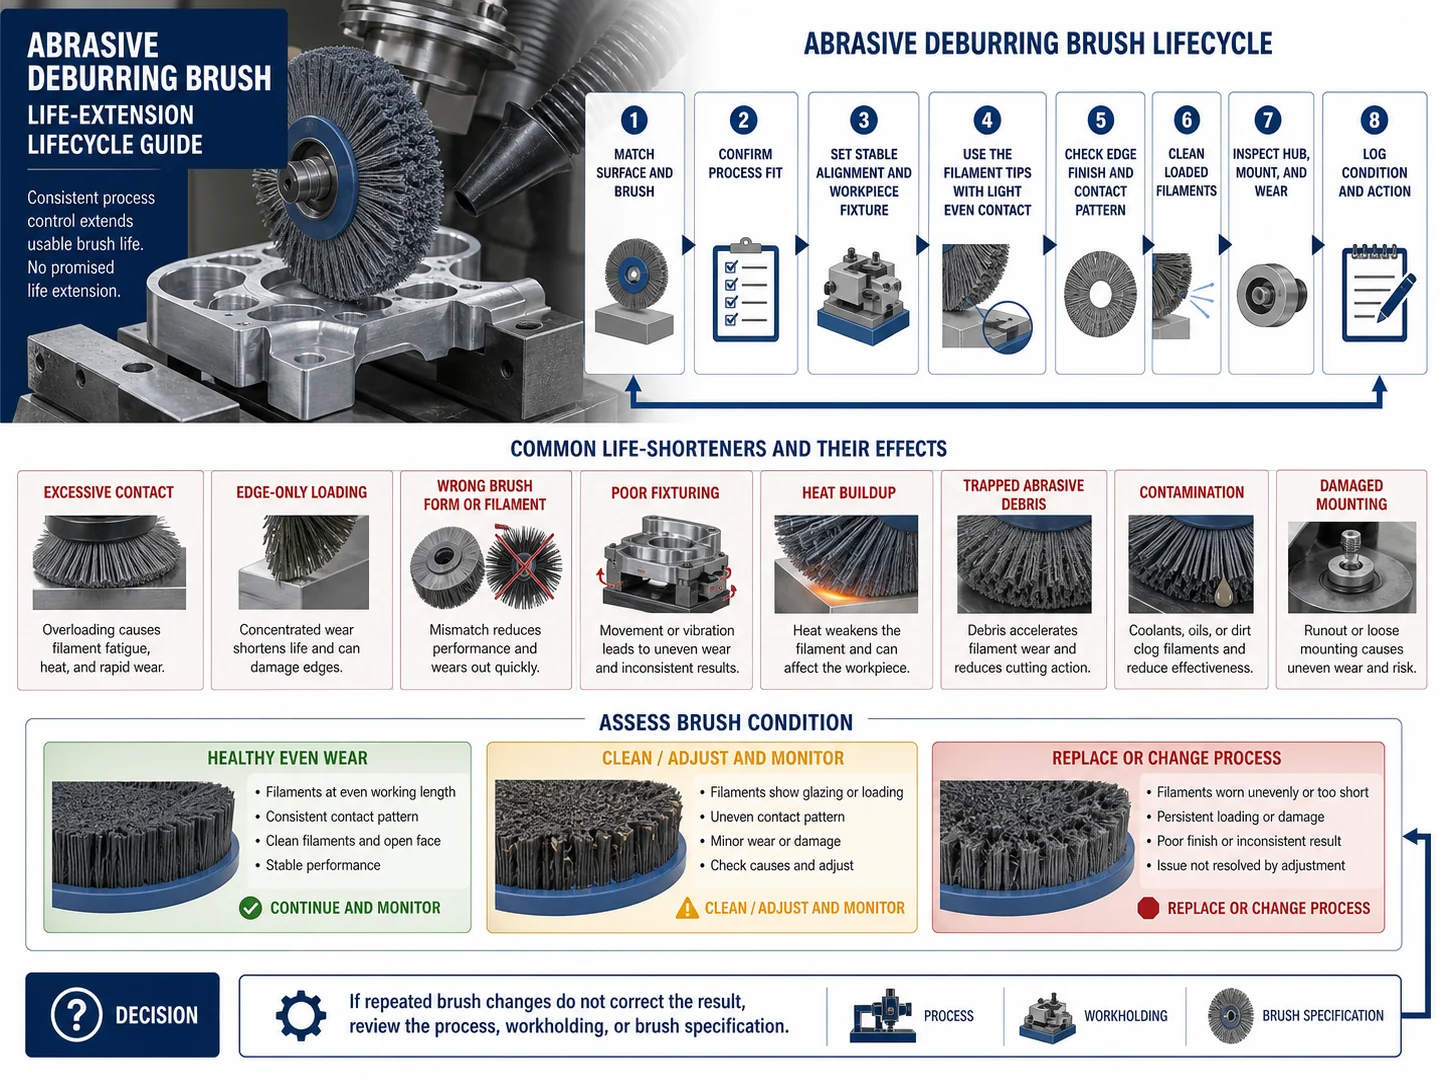
Extending Brush Life in Abrasive Deburring Applications should be judged by the actual job conditions, not by the product name alone. Start with base material, residue or burr severity, target finish, speed, pressure, and scratch tolerance. The right brush reaches the area, removes the target soil or finish defect, and avoids creating a second problem such as scratching, shedding, jamming, static risk, or contamination.
Extending Brush Life in Abrasive Deburring Applications should be evaluated from the actual cleaning task, not only from the product name. Start with base material, burr or oxide level, target finish, brush speed, pressure, and acceptable surface change. The right brush reaches the surface, removes the target residue, and avoids damage or contamination under normal working conditions.
For deburring, edge finishing, brush/scraper choice, burr control, and replace-vs-recondition decisions, this article cites LaRoux K. Gillespie — Deburring and Edge Finishing Handbook, Society of Manufacturing Engineers, 1999; deburring process selection and edge-finishing sections.
For mechanical surface finishing, buffing, polishing, abrasive finishing, surface preparation, and wear context, this article cites ASM Handbook, Volume 5: Surface Engineering, ASM International, 1994; mechanical finishing, buffing, polishing, and surface preparation sections.
For rotating abrasive wheel and machine guarding safety context, this article references OSHA — 1910.215 Abrasive Wheel Machinery.
For PPE hazard assessment and workplace protection, this article references OSHA — Personal Protective Equipment.
Practical Use Note
In daily use, the practical test is simple: check whether the brush reaches the full contact area, removes the target residue, and leaves the surface in the required condition. Record what changes when base material, burr or oxide level, target finish, brush speed, pressure, and acceptable surface change changes, because many brush failures are caused by the working condition shifting rather than by the brush body alone.
Surface and Brush Match Table
| Check point | What to confirm | Why it matters |
|---|---|---|
| Base material | Confirm hardness, coating, and scratch tolerance | A brush that is too aggressive changes the part, not just the residue |
| Target finish | Define burr removal, oxide removal, or blending goal | Prevents over-brushing and inconsistent results |
| Speed and pressure | Control contact force and dwell time | Extends brush life and reduces heat or gouging |
| Inspection point | Check the surface after a short trial | Validates the process before full production |
When This Brush Is Not Enough
This brush is not enough when the main problem is blocked access, unsafe working conditions, damaged equipment, incompatible chemicals, or a process setting that keeps recreating the residue. In those cases, review base material, burr or oxide level, target finish, brush speed, pressure, and acceptable surface change and confirm the surrounding cleaning method before increasing brush stiffness or contact pressure.
How to Check the Result
After brushing, inspect both the cleaned area and the brush. A good result removes the target soil while leaving the surface, bristles, mounting, and nearby components in acceptable condition. If cleaning improves only when pressure is increased sharply, the brush specification or the surrounding process should be reviewed.
Bottom Line
The best result comes from matching extending brush life in abrasive deburring applications to the real cleaning task rather than forcing one brush to solve every condition. Confirm access, residue, surface limits, and replacement routine first; then use a small trial or inspection step before scaling the method into daily work.
Real-Use Checks Before Daily Work
Before putting this brush into routine use, test it against the real working condition. Check the first cleaned part or area, the condition of the bristles, and where loosened debris goes after contact. If the result changes when base material, residue or burr severity, target finish, speed, pressure, and scratch tolerance changes, document the new setting instead of assuming the same brush will keep working.
A brush should not be used to hide a process problem. If residue returns immediately, if the surface changes more than expected, or if the brush must be forced to reach the target area, review the surrounding method first. In many applications, brushing works best with inspection, rinsing, vacuum support, machine adjustment, chemical compatibility checks, or a small sample trial.
Extra Field Checks
A short trial should check more than whether the surface looks cleaner. Watch how easily the brush reaches the area, whether residue is carried out or pushed deeper, whether bristles load with soil, and whether the surface changes after repeated passes.
If the brush only works with heavy pressure, the specification is probably too weak, too small, too soft, or being asked to solve the wrong problem. Adjust access, rinse or vacuum support, machine settings, or material choice before turning the brush into a more aggressive tool.
Process Fit Check
A useful brush choice should be checked against the actual process, not only against the product photo or nominal size. Look at how residue enters the area, how the brush carries material out, and whether repeated passes change the surface or the brush itself.
If the result is only acceptable for the first few uses, document the failure pattern. Loading, bristle set, heat, moisture, chemical exposure, or poor access often explains why a brush that looked correct during selection does not stay reliable in production or daily cleaning.
Frequently Asked Questions
Can I extend brush life by reducing pressure?
Often yes, but only if the brush still removes the burr. Too little pressure can leave burrs behind.
Does a harder brush always last longer?
No. A harder or more aggressive brush can wear quickly if it is overloaded or used on the wrong surface.
Should I clean abrasive brushes during use?
Yes. Removing trapped dust or chips helps the filament work more evenly and reduces heat buildup.
How do I know when to replace the brush?
Replace it when the deburring result becomes inconsistent, the brush is uneven, or inspection shows damaged filament or unsafe vibration.
When should I test another abrasive grade?
Test another grade when the current brush either wears too fast or fails to remove the burr without excessive pressure.